How do I add a student to Nessy?
A Group must be made to help categorise students for effective monitoring. Every student must be part of one. In Part 1, you’ll learn how to create your first Group. If you have a Group set up, you can skip to Part 2.
Part 1: Creating a ‘Group’
To get started, log in to Nessy Classroom. Need help logging in?
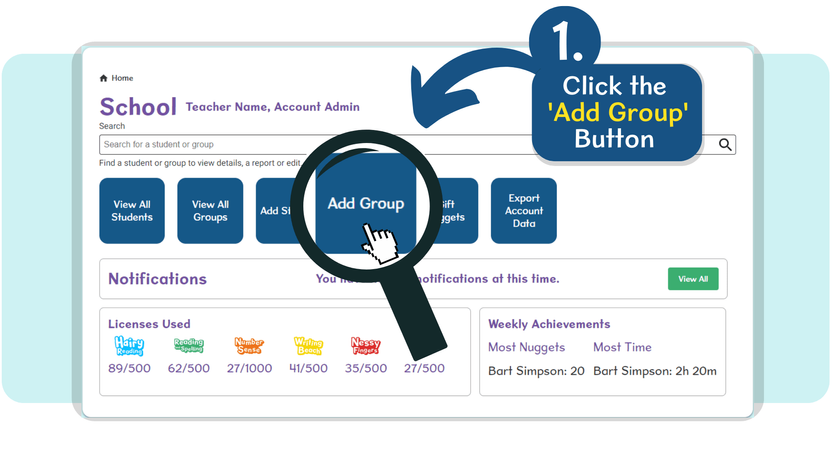
1. From the  Home page, click the Add Group button.
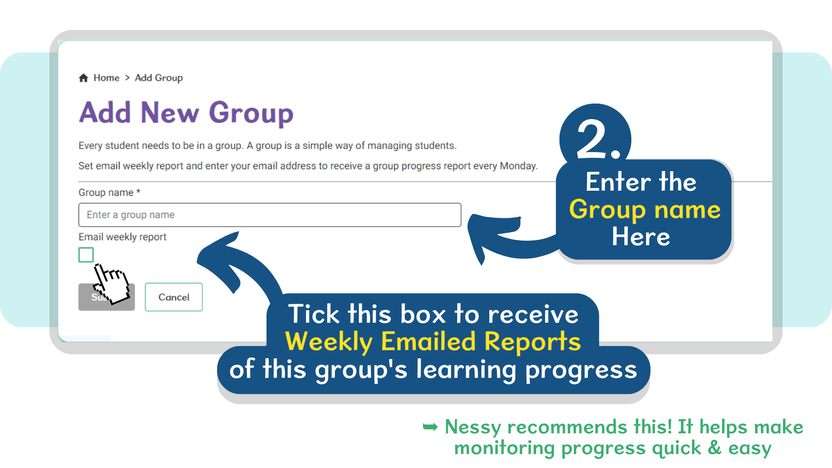
2. Enter the Group Name that you’d like this group of students to be called.
➥ Tick the box to receive weekly email reports of this group’s progress. This will help you monitor their learning journey.
Once complete, click the Submit button.
Part 2: Adding a student to your ‘Group’
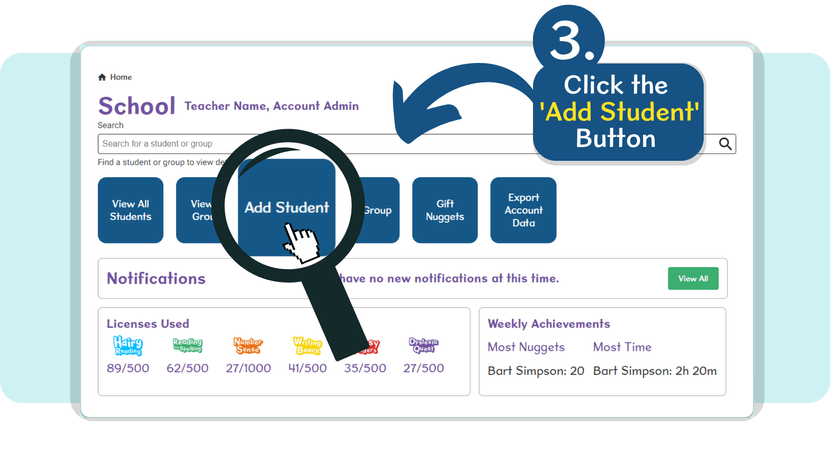
3. From the Home page, click the Add Student button.
4. Enter the student’s details then select which group they will be assigned to.
➥ Every student must be in a group. Add a student by selecting an existing group.
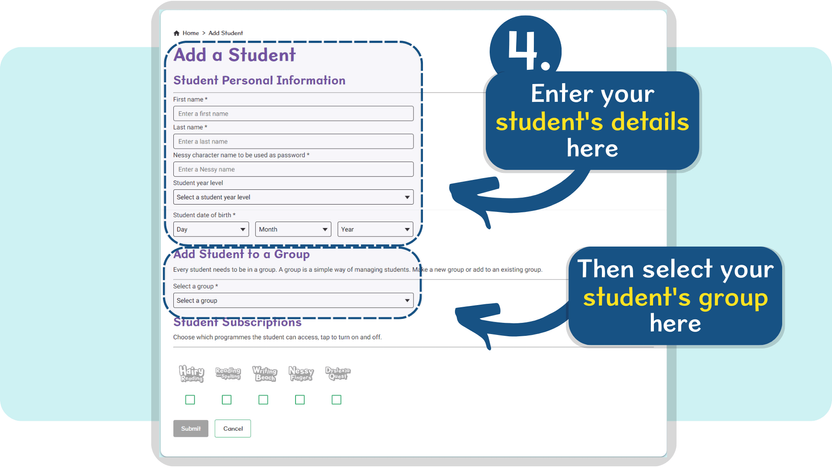
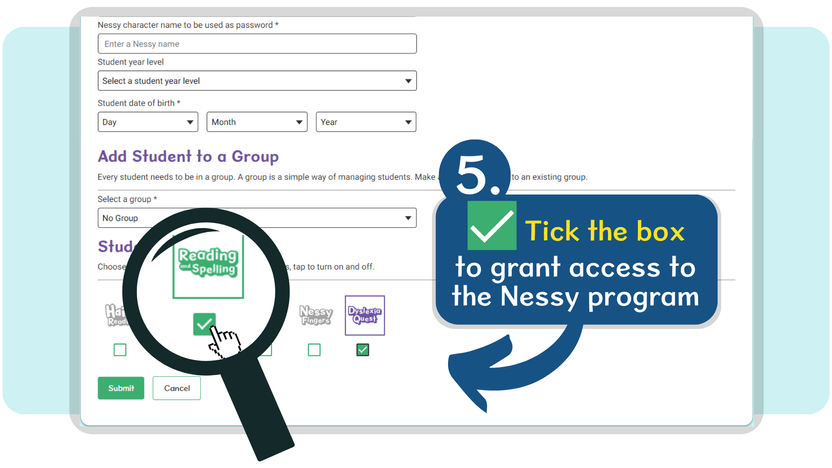
5. Choose which programs the student will have access to by ticking the program’s box.
Once complete, click the Submit button.